PySceneDetect CLI
See the documentation for a complete reference to the scenedetect command with more examples.
Quickstart
Split input video on each fast cut using ffmpeg:
scenedetect -i video.mp4 split-video
Save some frames from each cut:
scenedetect -i video.mp4 save-images
Skip the first 10 seconds of the input video:
scenedetect -i video.mp4 time -s 10s
Example
As a concrete example to become familiar with PySceneDetect, let's use the following short clip from the James Bond movie, GoldenEye (Copyright © 1995 MGM):
https://www.youtube.com/watch?v=OMgIPnCnlbQ
You can download the clip from here (right-click and save the video in your working directory as goldeneye.mp4).
Let's split this scene into clips on each fast cut. This means we need to use content-aware detecton mode (detect-content) or adaptive mode (detect-adaptive). If the video instead contains fade-in/fade-out transitions you want to find, you can use detect-threshold instead. If no detector is specified, detect-adaptive will be used by default.
Let's first save a scene list in CSV format and generate some images of each scene to check the output:
scenedetect --input goldeneye.mp4 detect-adaptive list-scenes save-images
Running the above command, in the working directory, you should see a file goldeneye-Scenes.csv, as well as individual frames for the start/middle/end of each scene starting with goldeneye-Scene-001-01.jpg. The results should appear as follows:
| Scene # | Start Time | Preview |
|---|---|---|
| 1 | 00:00:00.000 |  |
| 2 | 00:00:03.754 |  |
| 3 | 00:00:08.759 |  |
| 4 | 00:00:10.802 |  |
| 5 | 00:00:15.599 |  |
| 6 | 00:00:27.110 |  |
| 7 | 00:00:34.117 |  |
| 8 | 00:00:36.536 |  |
| ... | ... | ... |
| 18 | 00:01:06.316 |  |
| 19 | 00:01:10.779 |  |
| 20 | 00:01:18.036 |  |
| 21 | 00:01:19.913 | 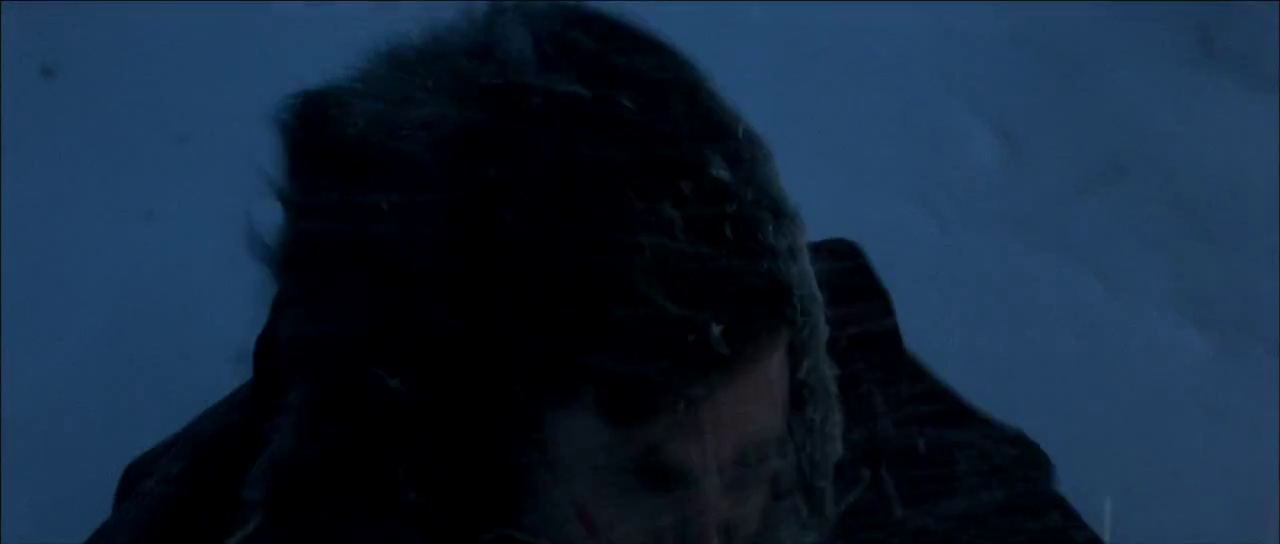 |
| 22 | 00:01:21.999 | 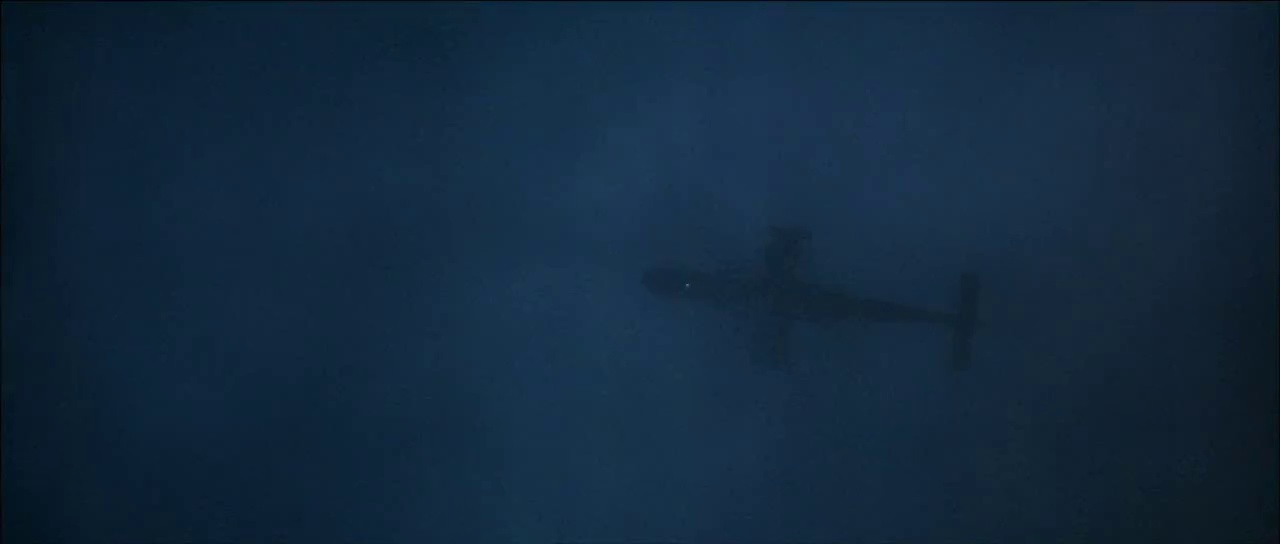 |
Splitting Video into Clips
The split-video command can be used to automatically split the input video using ffmpeg or mkvmerge. For example:
scenedetect -i goldeneye.mp4 split-video
Type scenedetect split-video --help for a full list of options which can be specified for video splitting, including high quality mode (-hq/--high-quality) or copy mode (-c/--copy).
You can also specify -h / --high-quality to produces near lossless results, or -p/--preset and -crf/--rate-factor (call scenedetect help split-video for details). If either -c/--copy or -m/--mkvmerge is specified, codec copying mode is used, at the expense of frame accurate cuts. Optionally, you can also specify the x264 -p/--preset and -crf/--rate-factor (see scenedetect split-video --help for details).
Detection Methods
PySceneDetect can look for fades in/out using detect-threshold (comparing each frame to a set black level) or find fast cuts using detect-content (compares each frame looking for changes in content). There also is detect-adaptive, which uses the same scoring as detect-content, but compares the ratio of each frame score to its neighbors.
Each mode has slightly different parameters, and is described in detail below. Most detector parameters can also be set with a config file.
In general, use detect-threshold mode if you want to detect scene boundaries using fades/cuts in/out to black. If the video uses a lot of fast cuts between content, and has no well-defined scene boundaries, you should use the detect-adaptive or detect-content modes. Once you know what detection mode to use, you can try the parameters recommended below, or generate a statistics file (using the -s / --stats flag) in order to determine the correct parameters - specifically, the proper threshold value.
Content-Aware Detection
Unlike threshold mode, content-aware mode looks at the difference between each pair of adjacent frames, triggering a scene break when this difference exceeds the threshold value.
The optimal threshold can be determined by generating a stats file (-s), opening it with a spreadsheet editor (e.g. Excel), and examining the content_val column (example). This value should be very small between similar frames, and grow large when a big change in content is noticed (look at the values near frame numbers/times where you know a scene change occurs). The threshold value should be set so that most scenes fall below the threshold value, and scenes where changes occur should exceed the threshold value (thus triggering a scene change).
Threshold Detection
Threshold-based mode is what most traditional scene detection programs use, which looks at the average intensity of the current frame, triggering a scene break when the intensity falls below the threshold (or crosses back upwards). The default threshold when using the detect-threshold is 12 (e.g. detect-threshold is the same as detect-threshold --threshold 12 when the -t / --threshold option is not supplied), which is a good value to try when detecting fade outs to black on most videos.
scenedetect -i my_video.mp4 -s my_video.stats.mp4 detect-threshold
scenedetect -i my_video.mp4 -s my_video.stats.mp4 detect-threshold -t 20
Using values for threshold less than 8 may cause problems with some videos, especially those encoded at lower bitrates or with limited dynamic range.
The optimal threshold can be determined by generating a statsfile (-s), opening it with a spreadsheet editor (e.g. Excel), and examining the delta_rgb column. These values represent the average intensity of the pixels for that particular frame (taken by averaging the R, G, and B values over the whole frame). The threshold value should be set so that the average intensity of most frames in content scenes lie above the threshold value, and scenes where scene changes/breaks occur should fall under the threshold value (thus triggering a scene change).
Adaptive Detection
The detect-adaptive mode compares each frame's score as calculated by detect-content with its neighbors. This score is what forms the adaptive_ratio metric in the statsfile. You can also configure the amount of neighboring frames via the frame-window option, as well as the minimum change in content_val score using min-content-val.
Detection Parameters
Detectors take a variety of parameters, which can be configured via command-line or by using a config file. If the default parameters do not produce correct results, you can generate a stats file using the -s / --stats option.
For example, with detect-content, if the default threshold of 27 does not produce correct results, we can determine the proper threshold by first generating a stats file:
scenedetect --input goldeneye.mp4 --stats goldeneye.stats.csv detect-adaptive
We can then plot the values of the content_val column:
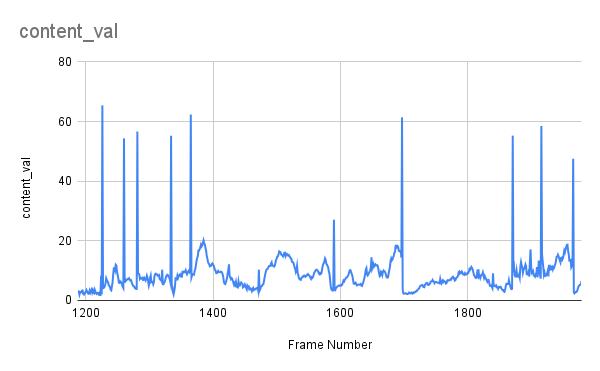
The peaks in values correspond to the scene breaks in the input video. In some cases the threshold may need to be raised or lowered accordingly.
Saving Image Previews of Detected Scenes
PySceneDetect can automatically save the beginning and ending frame of each detected scene by using the save-images command. If present, the first and last frames of each scene will be saved in the current working directory, using the filename of the input video.
Files marked 00 represent the starting frame of the scene, and those marked 01 represent the last frame (e.g. testvideo.mp4.Scene-4-01.jpg). By default, two images are generated.
Coming soon: If more are specified via the -n flag, they will start from 00 (the first frame) and be evenly spaced throughout the scene until the last frame, which will be numbered N-1.
Improving Processing Speed/Performance
The following arguments are global program options, and need to be applied before any commands (e.g. detect-content, list-scenes). They can be used to achieve performance gains for some source material with a variable loss of accuracy.
Assuming the input video is of a high enough resolution, a significant performance gain can be achieved by sub-sampling (down-scaling) the input image by a specific integer factor (2x, 3x, 4x, 5x...). This is applied automatically to some degree based on the input video size, but can be overridden manually with the -d / --downscale option.
This factor represents how many pixels are "skipped" in both the x- and y- directions, effectively down-scaling the image (using nearest-neighbor sampling) by the factor specified (the new resolution being W/factor x H/factor if the old resolution is W x H).
Another method that can be used to gain a performance boost is frame skipping. This method, however, severely reduces frame-accurate scene cuts, so it should only be used with high FPS material (ideally > 60 FPS), at low values (try not to exceed a value of 1 or 2 if using -fs / --frame-skip), in cases where this is acceptable. Using the frame skip option also disallows the use of a stats file, which offsets the speed gain if the same video needs to be processed multiple times (e.g. to determine the optimal threshold).
The option still remains, however, for the set of cases where it is still required. For example, if we skip every other frame (e.g. using --frame-skip 1), the processing speed should roughly double.
If set too large, enough frames may be skipped each time that the threshold is met during every iteration, continually triggering scene changes. This is because frame skipping essentially raises the threshold between frames in the same scene (making them more likely to appear as cuts) while not affecting the threshold between frames of different scenes.
This makes the two harder to distinguish, and can cause additional false scene cuts to be detected. While this can be compensated for by raising the threshold value, this increases the probability of missing a real/true scene cut - thus, the use of the -fs / --frame-skip option is discouraged.
Seeking, Duration, and Setting Start / Stop Times
Specifying the time command allows control over what portion of the video PySceneDetect processes. The time command accepts three options: start time (-s / -start), end time (-e / -end), and duration (-d / --duration). Specifying both end time and duration is redundant, and in this case, duration overrides end time. Timecodes can be given in seconds (100.0), frames (no decimal place, 100), or timecode as HH:MM:SS[.nnn] (12:34:56.789).
For example, let's say we have a video shot at 30 FPS, and want to analyze only the segment from the 5 to the 6.5 minute mark in the video (we want to analyze the 90 seconds [2700 frames] between 00:05:00 and 00:06:30). The following commands are all thus equivalent in this regard (assuming we are using the content detector):
scenedetect -i my_video.mp4 time --start 00:05:00 --end 00:06:30
scenedetect -i my_video.mp4 time --start 300s --end 390s
scenedetect -i my_video.mp4 time --start 300s --duration 90s
scenedetect -i my_video.mp4 time --start 300s --duration 2700
This demonstrates the different timecode formats, interchanging end time with duration and vice-versa, and precedence of setting duration over end time.
Config File
A configuration file path can be specified using the -c/--config argument. PySceneDetect also looks for a config file named scenedetect.cfg in one of the following locations:
-
Windows:
C:/Users/%USERNAME%/AppData/Local/PySceneDetect/scenedetect.cfg
-
Linux:
~/.config/PySceneDetect/scenedetect.cfg$XDG_CONFIG_HOME/scenedetect.cfg
-
Mac:
~/Library/Preferences/PySceneDetect/scenedetect.cfg
Run scenedetect --help to see the exact path on your system which will be used (it will be listed under the help text for the -c/--config option). You can click here to download a scenedetect.cfg config file to use as a template. Note that lines starting with a # are comments and will be ignored. The scenedetect.cfg template file is also available in the folder where PySceneDetect is installed.
Specifying a config file path using -c/--config overrides the user config file. Specifying values on the command line will override those values in the config file.
The syntax of a configuration file is:
[command]
option_a = value
#comment
option_b = 1
Example
[global]
default-detector = detect-content
min-scene-len = 0.8s

[detect-content]
threshold = 32
weights = 1.0 0.5 1.0 0.2

[split-video]
preset = slow
rate-factor = 17
# Don't need to use quotes even if filename contains spaces
filename = $VIDEO_NAME-Clip-$SCENE_NUMBER

[save-images]
format = jpeg
quality = 80
num-images = 3
See the scenedetect.cfg file in the location you installed PySceneDetect or download it from Github for a complete listing of all configuration options.
Video Splitting Requirements
PySceneDetect can use either ffmpeg or mkvmerge to split videos automatically.
By default, when specifying the split-video command, ffmpeg will be used to split the video. If the -c/--copy option is also set (e.g. split-video --copy), mkvmerge will be used to split the video instead.
FFmpeg
You can download ffmpeg from: https://ffmpeg.org/download.html
Note that Linux users should use a package manager (e.g. sudo apt-get install ffmpeg). Windows users may require additional steps in order for PySceneDetect to detect ffmpeg - see the section Manually Enabling split-video Support below for details.
mkvmerge
You can download and install mkvmerge as part of the mkvtoolnix package from:
https://mkvtoolnix.download/downloads.html
Note that Windows users should use the installer/setup, and Linux users should use their system package manager, otherwise PySceneDetect may not be able to find mkvmerge. If this is the case, see the section below to enable support for the split-video --copy command manually.
Enabling split-video Support
If PySceneDetect cannot find the respective tool installed on your system, you have three options:
-
Place the tool in the same location that PySceneDetect is installed (e.g. copy and paste mkvmerge.exe into the same place scenedetect.exe is located). This is the easiest solution for most users.
-
Add the directory where you installed ffmpeg/mkvmerge to your system's PATH environment variable, ensuring that you can use the ffmpeg/mkvmerge command from any terminal/command prompt. This is the best solution for advanced users.
-
Place the tool in a location already in your system's PATH variable (e.g. C:/Windows). This is not recommended, but may be the only solution on systems without administrative rights.